> >

|
|
90k Mile: Manual TransmissionChange Oil This job is much easier than it might appear to
be on first examination. You just need some special tools.
The replaced oil seems to make shifting much nicer, so I'm sure that the old oil was due for a change. My transmission was replaced at 12k miles meaning that I changed my transmission oil at only 80k miles on the transmission, so I think I would be motivated to move this procedure up to 60k mile maintenance. Tools needed: Philips screwdriver (to remove under body panel) 10mm hex socket (to remove under body panel) 15mm socket Hazet 2567-16 socket key insert Here's one place you can buy one. Mine cost about $26. 17mm hex key (best if you can find one with a ratchet drive, I used a basic allen wrench) Drain pan Oil pump (available from any auto parts store) Mine didn't fit the Porsche bottle, but worked well enough. Torque wrench capable of measuring 18 ft-lb Torque wrench capable of measuring 48 ft-lb Parts needed: 999-917-546-00 ORMD-Transaxle oil I paid over $53 for three quarts from the dealership. You'll hear all sorts of opinions on what oil to use. A friend swears by Redline, but I'm less than impressed by their distribution and the fact that they kept giving different information about their product. In particular they said to buy a specific part number and to add a half quart of another oil for the additives. But then they told me that the product now has the additives and the extra oil type is not needed. But it's the same part number, so how am I to know if the container I'm buying is the updated kind or not? The local race shop swears by Mobil1 SHC, but I only found it in 5 gallon containers for $107. Finally, realizing that I don't know enough about oil to decide what is good or what is bad, and doubting that anyone else really knew much either, I decided to go with the stuff sold by Porsche. Very expensive, but you only change it every 90k miles. The new fluid seems to make shifting much nicer, so I'm sure that the old oil was due for a change. My transmission was replaced at 12k miles, so I think I would be motivated to move this procedure up to 60k mile maintenance. Procedure: Although this is easy, it's not as straightforward as you might hope. You have to remove the diagonal braces and the transverse strut panel to access the drain and fill plugs of the transmission. Jack up the car on a lift or put it on jack stands. I like the jack stand pads I had designed and built, but they're not necessary. In this case, it is vital to support the car from the jack points because you need to hold the frame of the car secure while the braces are removed. First, remove the rear most underbody plastic panel. This entails at least partially removing the rear wheel mud guards in front of the rear wheels. 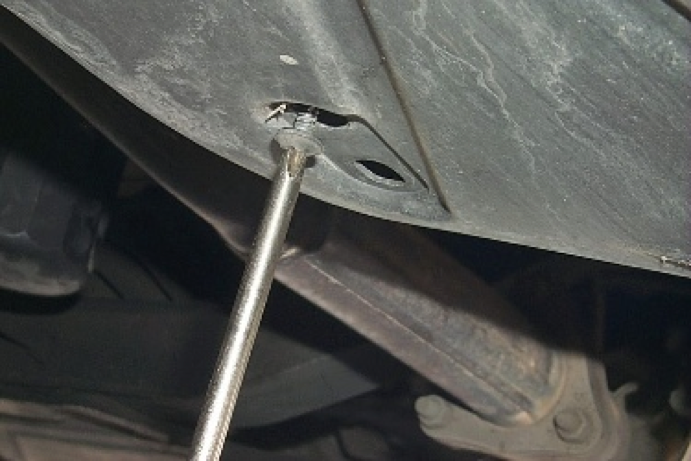 I counted three philips screws and . . . 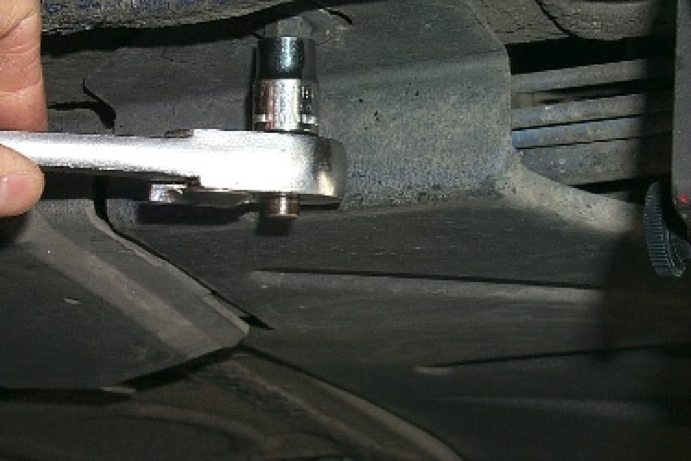 . . . three 10mm plastic nuts. It's hard to photograph under there and it's pretty simple to see how this is removed, so I'll leave it at that. Now the goal is to remove the transverse strut panel, but that means you have to remove the underbody panel (as noted above) and the two diagonal braces. The workshop manual says that if you support the car by the jack points noted in the owner's manual and don't move the car while these braces are off, you don't need to realign the suspension. I would recommend it anyway, you're probably due for it to be checked at 90k miles anyway. Remove the 15mm bolts and nuts holding the two diagonal braces. 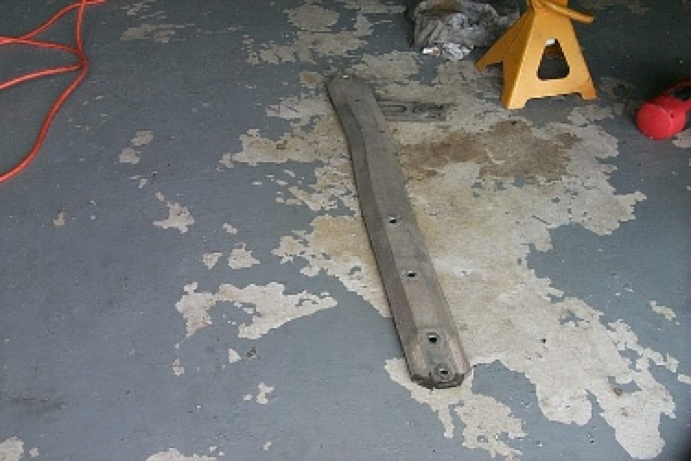 Be careful because nothing hold these on once the last bolt is removed, and it could fall down on your head or finger while you're under the car. Support it with one hand while removing that last bolt. I suggest removing the middle-most bolt last for balance. Now remove the transverse strut panel using the 15mm socket.  I sprayed a penetrant on the bolts to make sure they came loose, but it wasn't necessary. Probably because my transmissions and engines have been in and out of the car on a very regular basis due to frequent oil leaks and other failures. Once all the nuts and bolts are removed, you'll need to persuade the panel to come off. Try to remove it straight so that it doesn't bind up on one side or the other. It's a somewhat tight fit. 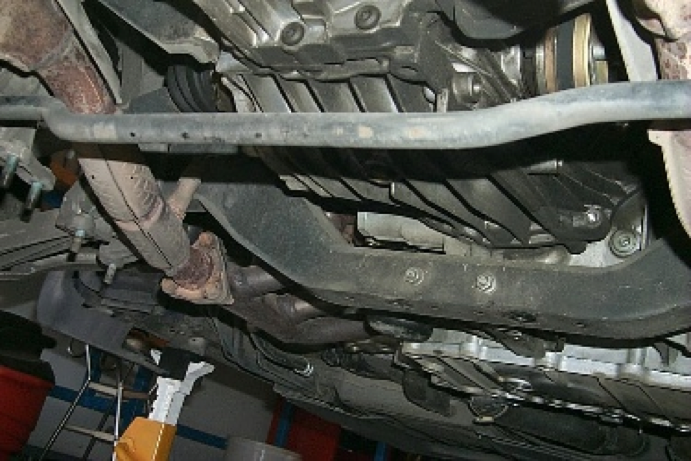 Now you have a naked bottom side of the car. Put the drain pan under the transmission, and using the special hazet tool, remove the drain plug.  This stuff smells nasty. Once all the oil is out, clean the plug and the drain hole and put the plug back in. Tighten to 18 ft-lb Now, look up on the left side of the transmission. You'll see a fill plug the same size as the drain plug, but stupidly needing a different tool to remove it. I think hazet has some sort of license agreement with Porsch e!! Just kidding. The threads on both plugs are the same and the dimensions appear identical, but one requires a 17mm hex key, and the other requires a hazet tool. Don't ask me why. It's a bit hard to see the fill plug. It's even harder to photograph without getting shadows. In this picture you can see both the drain plug and the fill plug. 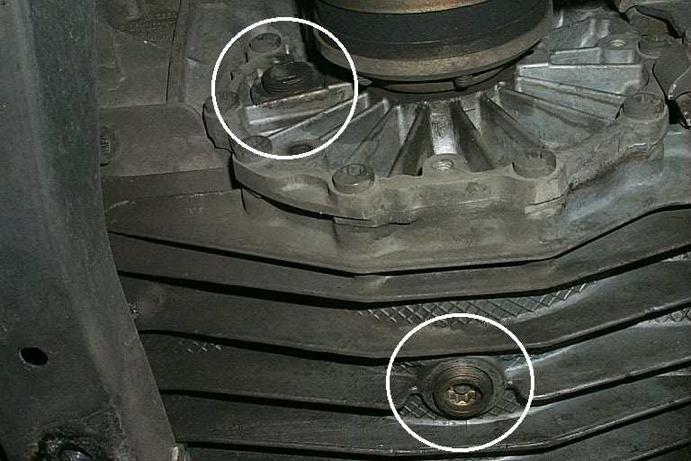 Remove the fill plug. If you have a ratchet this would be much, much easier. I didn't have one, so it was very slow but I was able to do it with perseverance. Now pump two liters of transmission oil into the gear box. You should need 2.25L of oil, but after putting in 2 liters, pump a little at a time and measure the fill level.  My pump didn't fit the Porsche containers and only sucked out a half a bottle. I had to transfer from one bottle to another to get enough into the transmission. You know you have enough oil when the oil level is 11mm below the bottom of the fill hole. I used a small allen wrench and inserted it into the fill hole pointed down. Then I measured the distance from the bend of the allen wrench to the wet spot. When it was 11mm, I stopped adding oil. Put the fill plug back in, torque to 18 ft-lb if you can, I had to estimate the torque by hand. Reassembly of the transverse strut panel, the diagonal braces, and the rearmost underbody panel is straightforward. Go to Skyler's Home page Send Skyler your two cents | |