
All photos on these instructions created by Gretchen Roufa
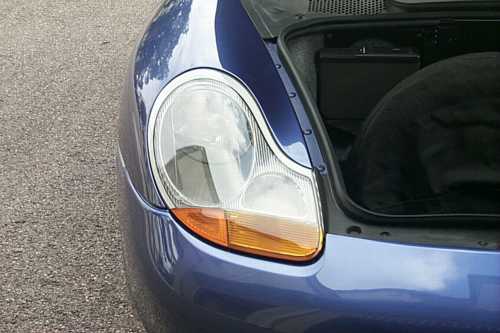
There are many reasons for installing litronic (xenon) headlights on a boxster. Some people like the look of the lights. I like the look of the hardware itself. The litronics come with a clear turn signal instead of the standard orange. You can see how the orange would stand out on a blue car.
The procedure is remarkably simple to install them. You can just slide out the old, and slide in the new and be done with it. They work just fine that way, but you don't get one feature of the lights, that is the highbeam rotation. The module is supposed to rotate the normal beams up 1.5 degrees to augment the high beams when they are activated. This fills in the light below the high beams a bit better. Installing the control module is relatively simple, but does require some modest confidence working with electrical wiring.
These litronics differ from the factory installed ones in two ways. First, the factory litronics will adjust the aim of the light to compensate for the car's suspension motions when accelerating and decelerating. That is, when braking, they will aim upwards a bit more so they keep pointing down the street instead of pointing at the ground.
The second difference is that these litronics will not communicate with the computer to notify you of a fault in the system.
This section of my site is divided into seven somewhat large pages with lots of pictures. Here's an index so you can get to them faster if you need to go back and forth.
1. Introduction (This page): Starting off, removing old lights
2. Removing the Rear Components: CD changer, amp
5. Wiring it up
6. Finishing up
7. Adjusting the Mounting Plate: Not normally needed, but it may come in handy
This web site is not intended to replace the Porsche instructions. It is intended to supplement them. You should have a copy of Porsche Technical Information bulletin 9415 for the boxster. It comes in Binder 9, Electrics. I don't know what binder this is, all I got was a xerox copy from the dealer that sent it to me. If you don't have it, contact your dealer. If you're in a jam, you can email me and I might find a way to help out. By the way, I got my litronics from Bill Hodges at Suncoast Porsche in Sarasota, Florida. They've got them for sale often for almost $500 cheaper than any other dealer. It's something to do with volume, I'm sure. They're great people and fantastic to deal with, I highly recommend them.
First, here's what I started with. Headlights with ugly orange on the bottom.
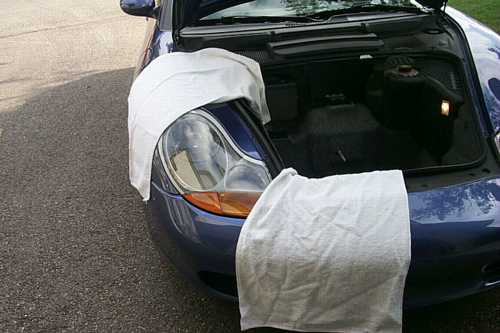
The first thing to do is to remove the old headlights. This is clearly explained in the owner's manual, and I won't go into too much detail. I recommend that you lay some cotton towels or some other non-scratching material (if you don't have a bra) to protect your paint. It's very easy to drop things on your car.
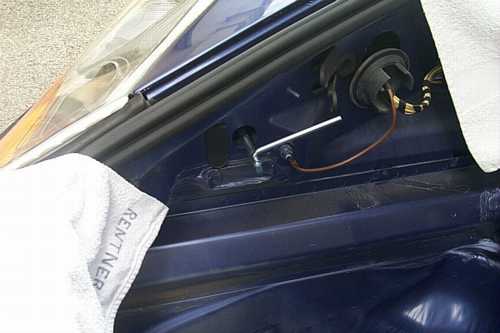
Essentially, you peel back the trunk liner, remove a rubber plug. . .
. . . insert the tool from the tool kit, and pop it out. Easy.
Next step is to remove the rear components, like the CD changer if you have one, and the amp if you have one.
|
Skyler's instructions are a necessity for the install. I've put in several pairs for friends using his instructions; here are some tips I've found... 1. The wiring harness connector that is found on Mike's website was moved to the opposite side of the car (driver's side)on newer cars. You need to remove the plastic housing surrounding the brake cylinder if you have a later model car. Also, I couldn't find the all-white wire on this connector so I used the white with a black stripe. Don't know if this is correct, but it worked. 2. There are black rubber plugs
to punch thru to run the wires into the fender. No need to drill.
Seal the hole with some black RTV once you run the wires thru.
4. the wire to the windshield washer can be pushed thru a large 4 inch or so rubber gasket on the drivers side bulkhead. Use an awl to make a hole then push the wire thru into the area with the battery.. no drilling necessary but it's a tight fit. 5. I mounted the control box on a small ledge under the master brake cylinder. It fits in there nicely and there is a ground lug on the driver's side inner fenderwall that's just the right distance for the control box's brown ground wire.
7. Take your time, layout everything in your head before mounting the box. The 2 headlight leads are different lengths. |
Back to Skyler's Web Site